Post by ravix on Mar 2, 2012 21:43:27 GMT
So as promised, here is a quick step-by-step guide on how to make my wraiths.
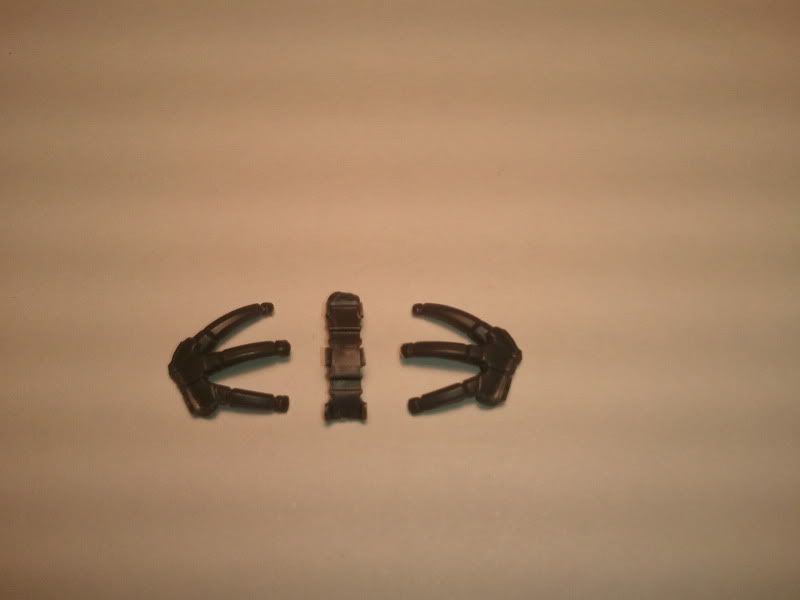
Parts and Tools
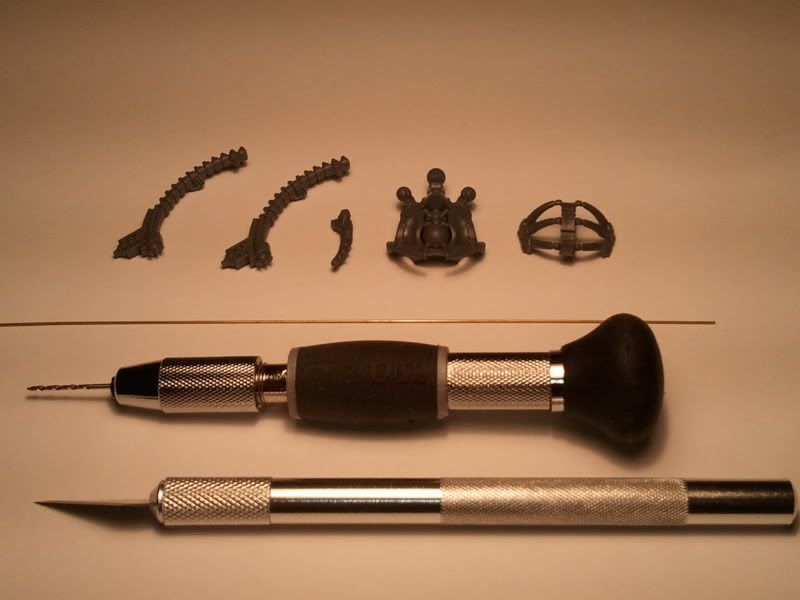
(from left to right)
• 2 spine columns (Ghost Ark Kit)
• 1 Praetorian tail (Lychguard Kit)
• 1 back half of the Praetorian torso (Lychguard Kit)
• 1 Praetorian jump pack (Lychguard Kit)
What is nice about all these pieces is that they are all extra bits you would have left over from your kits... so long as you are not planning to make the Praetorians or use the spines on the warriors inside the ghost ark.
Tools are an Exacto knife, a pinning drill and pinning metal, and super glue (forgot to show it in the pic but I think that should be obvious)
Step 1: Making the tail
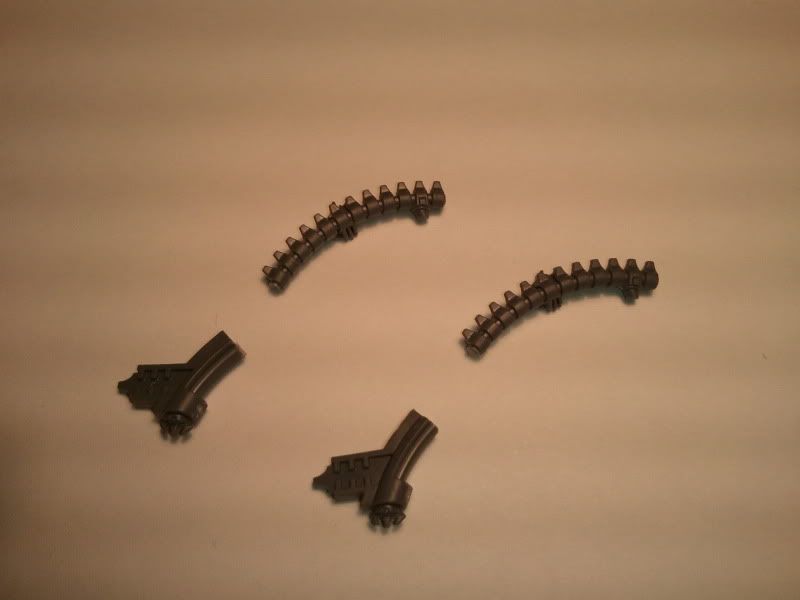
Remove the square block piece at the end of each spine.
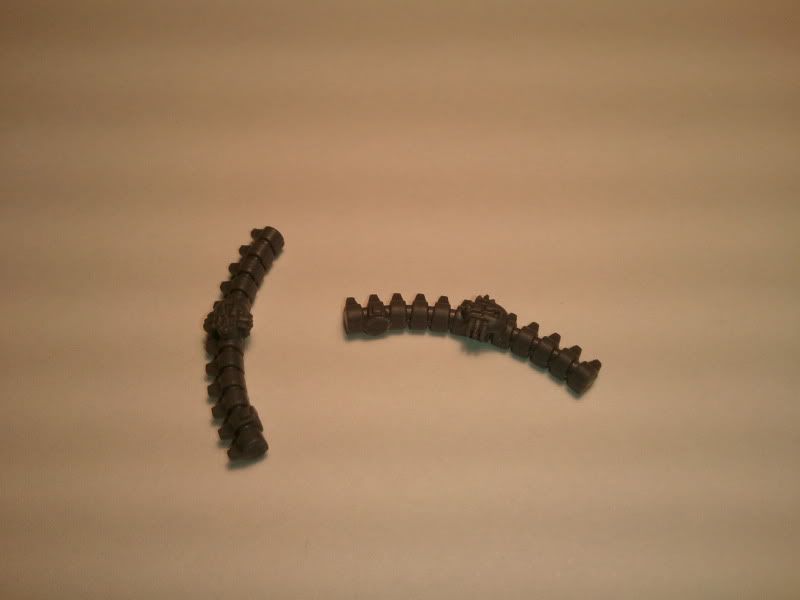
Clean the ends of each spine so that they are flat. Also, remove the nubs that stick out on each spine.
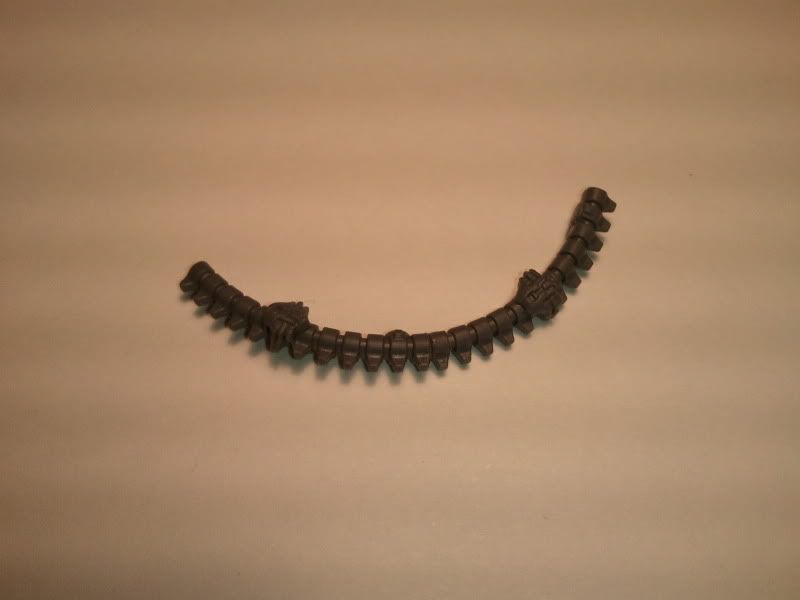
Glue the two spines together. You may have noticed that there are little scarabs on them, I always make sure they are facing the same direction because I'm paranoid like that. (don't have to though)
Cut the fat part off the Praetorian tail.
Glue the tail tip onto the end of the spine.
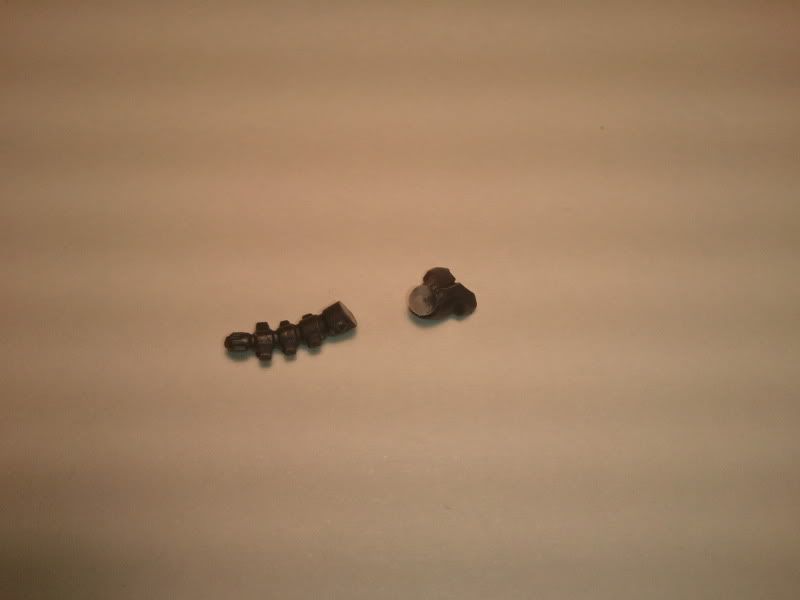
Step 2: Making the body
Cut the middle section off the Praetorian jump pack.
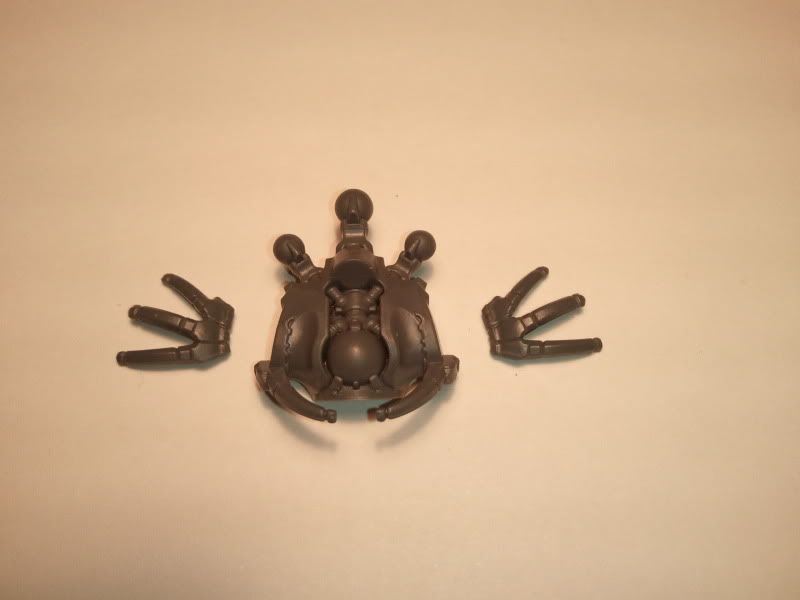
Keep the parts that looks like little legs.
Glue the legs onto the side of the Praetorian torso.
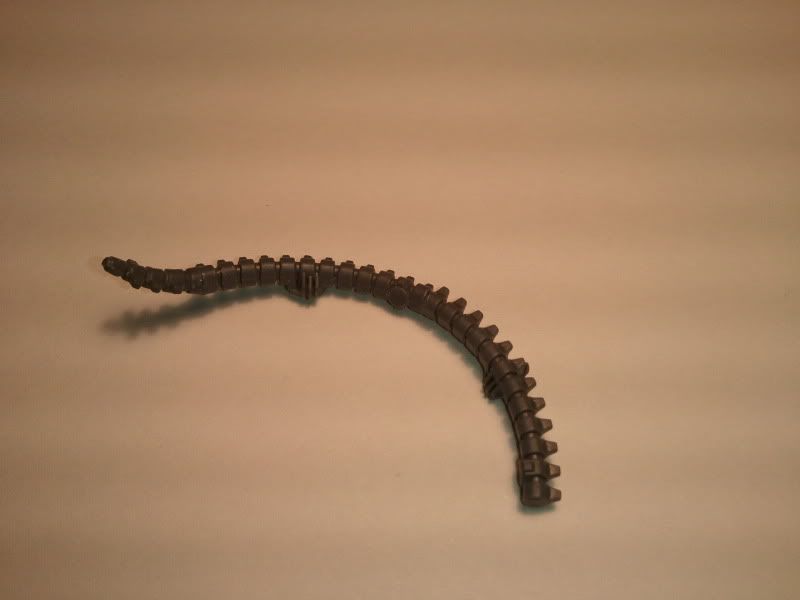
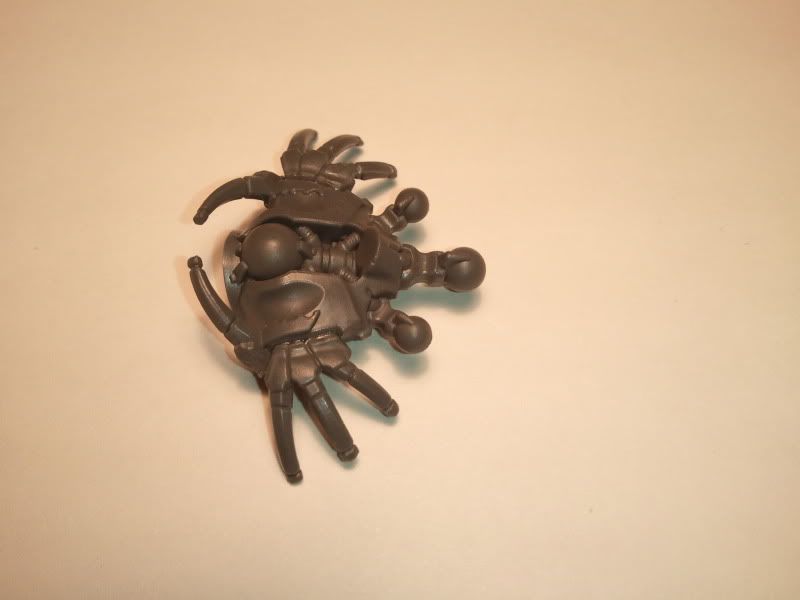
This is where things get a little tricky. Note the top of the new tail. I removed some of the spines and even shaped it so it gets a lot narrower. This is needed so the tail can fit to the body more snug. Make adjustments until it fits the contour of the torso.
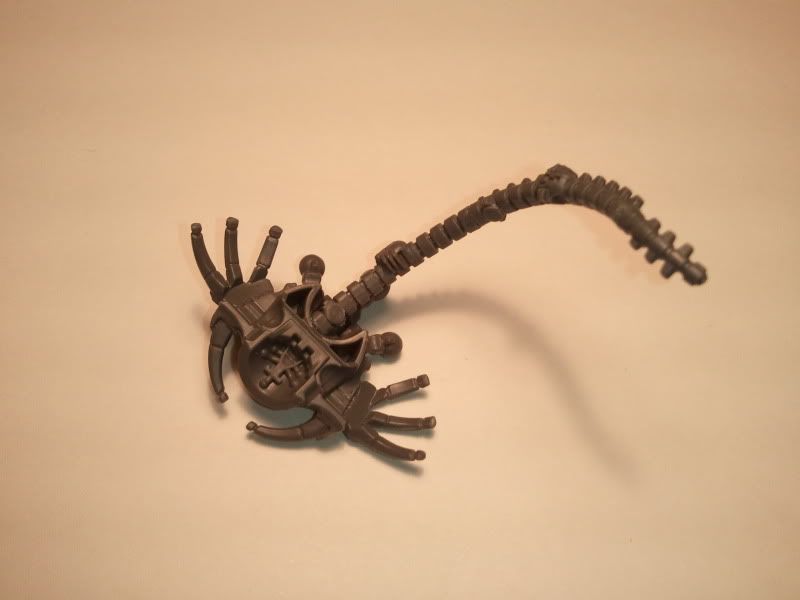
If done right, it should look like this.
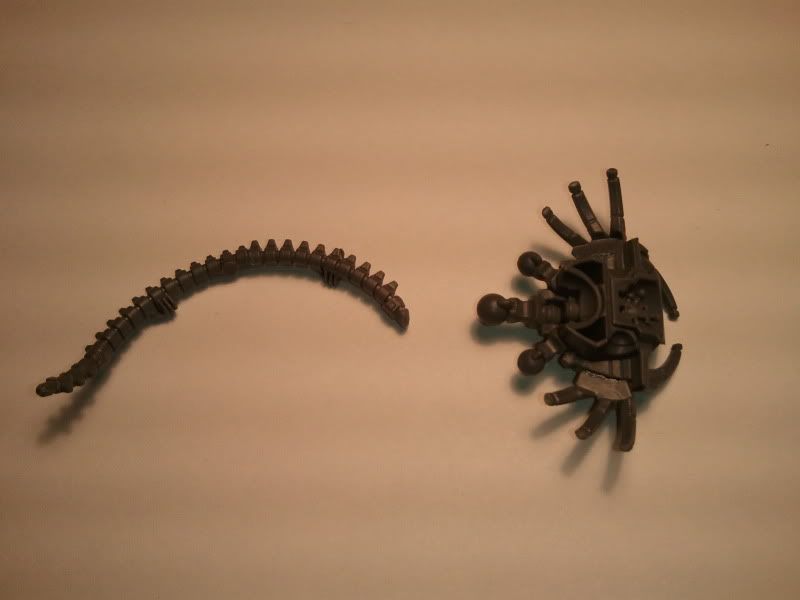
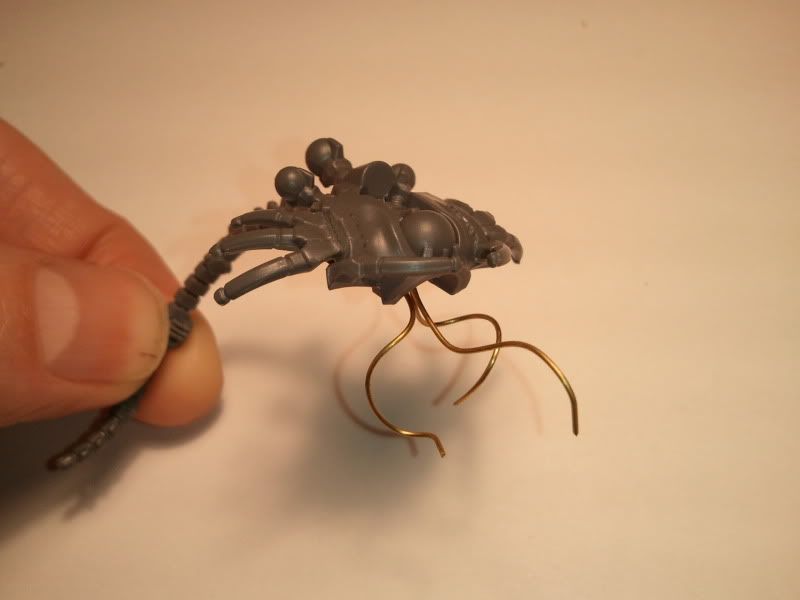
Step 3: Whip Coils
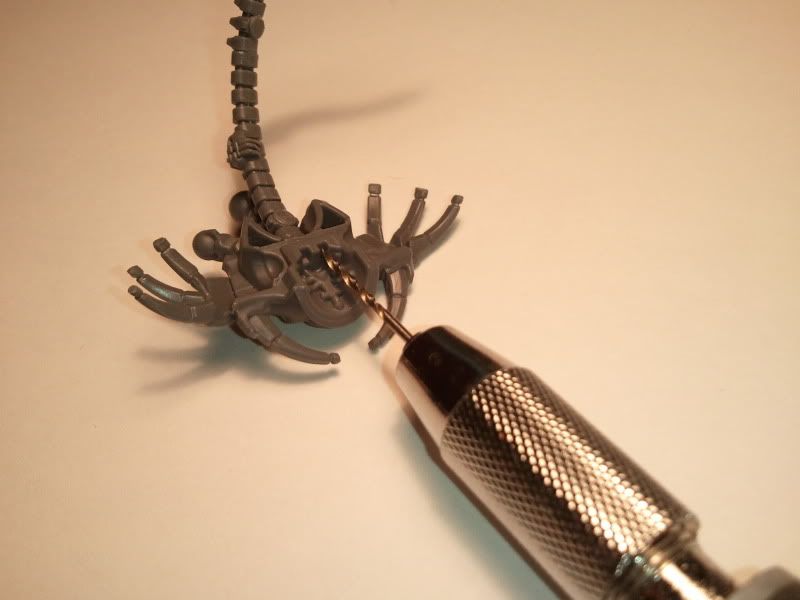
Get that pinning set out. *Note this is only needed if you want the whip coils.

Drill 4 holes as shown above. There is 1 where the tail meets the body (this is for pinning the model to the clear flying stand) and 3 in the mouth where the metal pinning pieces go.
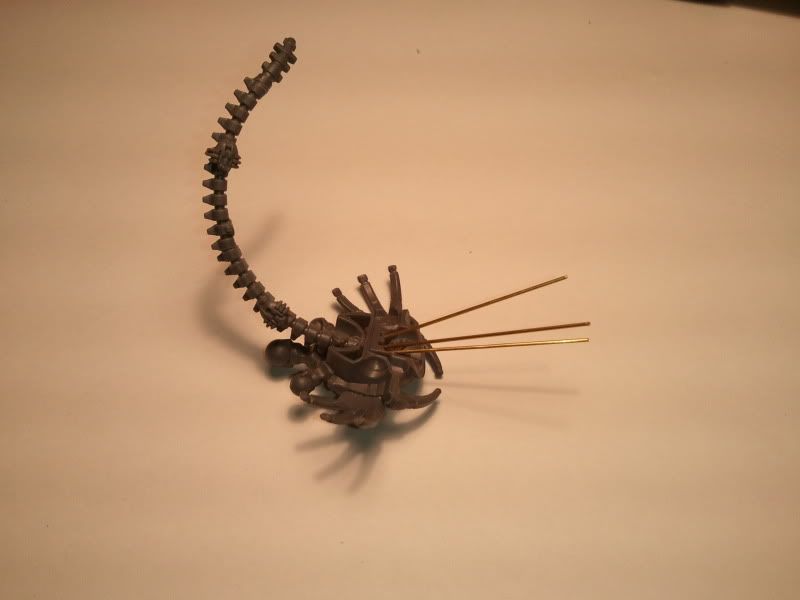
Cut 3 pieces of your pinning metal (about 1.5" in length) and glue them into the holes.
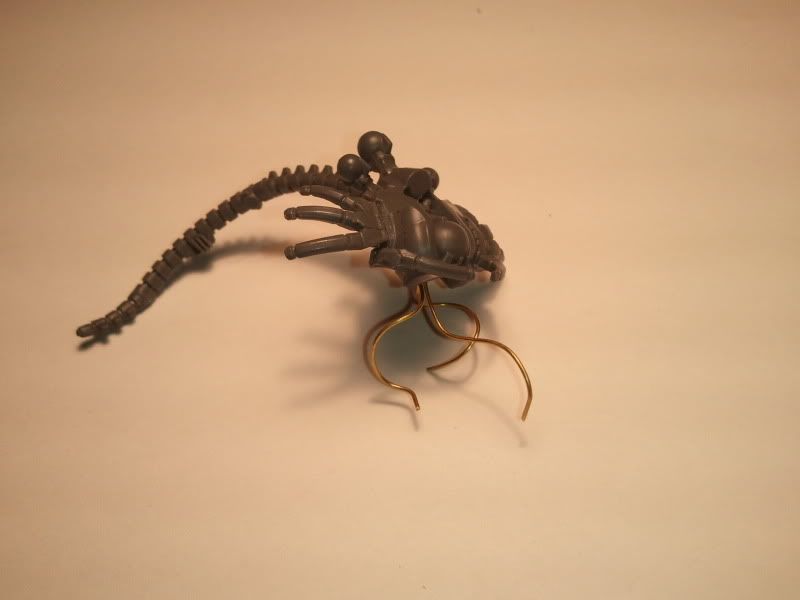
Once the glue has dried, bend the metal into the shape you want.
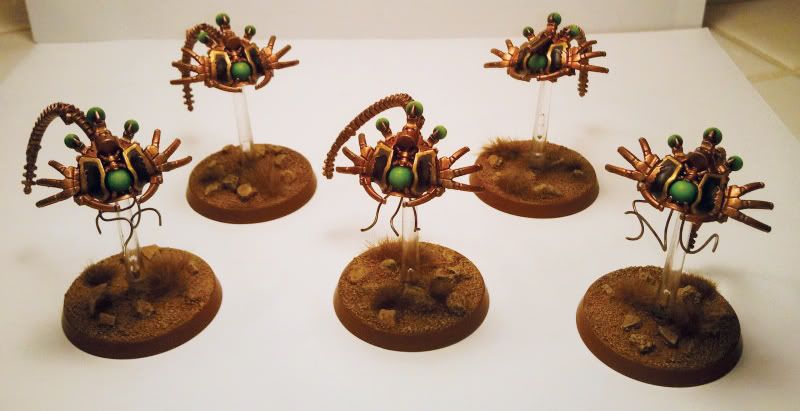
And there you have it! From there you can prime it. You will have to make a flying stand for it but all that uses is one of those flying clear stems with a piece of the pinning metal sticking out the top to put into the 4th hole we made (where the tail meets the body).
Anyways, that's pretty much it.
Questions?
Parts and Tools
(from left to right)
• 2 spine columns (Ghost Ark Kit)
• 1 Praetorian tail (Lychguard Kit)
• 1 back half of the Praetorian torso (Lychguard Kit)
• 1 Praetorian jump pack (Lychguard Kit)
What is nice about all these pieces is that they are all extra bits you would have left over from your kits... so long as you are not planning to make the Praetorians or use the spines on the warriors inside the ghost ark.
Tools are an Exacto knife, a pinning drill and pinning metal, and super glue (forgot to show it in the pic but I think that should be obvious)
Step 1: Making the tail
Remove the square block piece at the end of each spine.
Clean the ends of each spine so that they are flat. Also, remove the nubs that stick out on each spine.
Glue the two spines together. You may have noticed that there are little scarabs on them, I always make sure they are facing the same direction because I'm paranoid like that. (don't have to though)
Cut the fat part off the Praetorian tail.
Glue the tail tip onto the end of the spine.
Step 2: Making the body
Cut the middle section off the Praetorian jump pack.
Keep the parts that looks like little legs.
Glue the legs onto the side of the Praetorian torso.
This is where things get a little tricky. Note the top of the new tail. I removed some of the spines and even shaped it so it gets a lot narrower. This is needed so the tail can fit to the body more snug. Make adjustments until it fits the contour of the torso.
If done right, it should look like this.
Step 3: Whip Coils
Get that pinning set out. *Note this is only needed if you want the whip coils.
Drill 4 holes as shown above. There is 1 where the tail meets the body (this is for pinning the model to the clear flying stand) and 3 in the mouth where the metal pinning pieces go.
Cut 3 pieces of your pinning metal (about 1.5" in length) and glue them into the holes.
Once the glue has dried, bend the metal into the shape you want.
And there you have it! From there you can prime it. You will have to make a flying stand for it but all that uses is one of those flying clear stems with a piece of the pinning metal sticking out the top to put into the 4th hole we made (where the tail meets the body).
Anyways, that's pretty much it.
Questions?